Eggplant Gratin

For some reason, I was thinking about Fairway Market in New York City last night.  I used to shop at the original flagship store on Broadway at 74th Street on the Upper West Side of Manhattan.  Let me tell you, there was never a dull moment in this store.  It was impossible to push a cart around without running into people, but it was a gourmet treasure trove.  My favorite section was the cheese department.  You had to yell out what you wanted and fight your way to get noticed.   In Fairway, anything could happen.  I actually saw one lady hit another old lady over the head with an eggplant so she would get out of the way in the store in the mid 1980s.  Too bad I didn’t walk around with a camera at the time.  Anyway, I thought it would be fitting to post an eggplant recipe from the Fairway recipe section on their website.

Fairway Market is a grocery chain. Founded in the 1930s, it is one of the United States’ highest grossing food retailers per square foot with 14 million customers per year. The stores are known for vast selections of fresh products and everyday groceries at a good value. The Fairway stores carry a wide variety of private label products in specialty and basic items. Fairway has had significant store expansion in the New York area, with 9 locations in the tri-state area including 9 food markets and 2 wine and spirit shops.

What I would do to be there now!

Eggplant Gratin

Serves 2

1 small Spanish onion, thinly sliced
2 cups plus 2 Tbs olive oil, divided
1 large eggplant, sliced into ½ inch rounds
Salt & pepper, to taste
1 tsp herbs de provence
2 cups tomato sauce
½ cup shredded gruyere

Preheat oven to 350˚.

Over medium heat, sauté onion in olive oil until golden brown, about five minutes, stirring frequently.

Remove onion and set aside. Add remaining olive oil to pan, and increase heat to medium-high. Fry eggplant in olive oil for 2 minutes on each side, or until golden brown, with care not to overcrowd the pan—fry in batches if space does not permit.

Remove from oil and drain thoroughly in a colander.

Place in a bowl with sautéed onions, salt, pepper, and herbs de provence. Add tomato sauce and mix.

Layer eggplant mixture in oven-safe dish. Sprinkle with gruyere. Bake at 350˚ for 15 minutes or until hot and bubbling. Serve, preferably with good, crusty bread.
Butternut Squash and Leek Bake

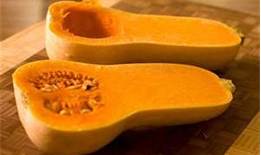
Butternut squash is one of the symbolic gourds of the Autumn.  I just wish I lived in a city that had an autumn……  I have to live vicariously through the sweater clad crowd.  It’s just not fair!  Though, I guess when you’re buried in snow, I can be outside sipping a lovely chardonney.  Sorry to complain….

Butternut Squash and Leek Bake

Serves 2

2 small leeks, trimmed
12 oz butternut squash, cut into large cubes
1 tsp olive oil
1 small onion, finely chopped
2 medium free range eggs
1 egg white
12 oz low fat natural yogurt
1 tsp chopped fresh sage leaves
Generous grating of nutmeg
2 Tbs parmesan cheese, finely grated

Preheat an oven to 375°.

Cut the leeks in half and then cut again lengthwise.

Steam the butternut squash for 10 minutes until almost tender, adding the leeks in the last few minutes.

Meanwhile heat the oil in a small pan and gently fry the onions until transparent. Remove from the heat.

In a large bowl beat together the eggs and egg white, yogurt, nutmeg and sage, and then stir in the cooked onion.

Drain the squash and leek and spoon into a medium sized gratin or ovenproof dish.
Pour over the egg mixture making sure all the vegetables are covered.

Sprinkle the parmesan cheese on top and bake for 25-30 minutes until the bake is risen and golden brown. Serve at once.

Ropa Vieja in a Slow Cooker

It’s crock pot season and this recipe has absolutely no prep work involved.  You literally dump everything in a crockpot and turn it on!

Ropa vieja, which is Spanish for “Old Clothes,” is a popular dish of the Canary Islands, Cadiz, Greater Miami and the Caribbean, especially Cuba, Panama, Puerto Rico, and the Dominican Republic. It is a shredded flank, brisket or skirt steak in a tomato sauce base.

There are many theories as to how the dish was named. One of the more popular ones is a story about a man whose family was coming to his home for dinner. Being very poor, the man could not buy them enough food when they came. To remedy his situation, he went to his closet, gathered some old clothes (ropa vieja) and imbued them with his love. When he cooked the clothes, his love for his family turned the clothes into a wonderful beef stew.

Ropa Vieja in a Slow Cooker

Serves 4 – 6

2 lb flank steak, halved lengthwise and cut crosswise into 4 pieces
Kosher salt and freshly ground pepper
28 oz can diced tomatoes
1/2 cup water
1 red bell pepper, thinly sliced
1 green bell pepper, thinly sliced
1 medium onion, cut into ¼-inch dice
2 garlic cloves, thinly sliced
1 jalapeño, seeded and thinly sliced
½ tsp dried oregano
½ tsp ground cumin
1 bay leaf
½ cup pitted green olives
2 Tbs capers, drained
3 Tbs coarsely chopped cilantro
Steamed white rice or warm tortillas, for serving

Season the flank steak with salt and pepper. In a slow cooker, combine the diced tomatoes and their juices with the water, bell peppers, onion, garlic, jalapeño, oregano, cumin and bay leaf. Add the flank steak, cover and cook on high for 5 hours, until the meat is very tender.

Transfer the meat to a cutting board and let rest for 10 minutes. Discard the bay leaf. Stir the olives, capers and 1 tablespoon of the cilantro into the sauce.

 Using 2 forks, shred the meat. Return the meat to the sauce to warm through. Season the sauce with salt and pepper. Spoon the meat and sauce into bowls, sprinkle with the remaining 2 tablespoons of cilantro and serve with steamed white rice or warm tortillas.

Make Ahead The ropa vieja can be refrigerated for up to 2 days.

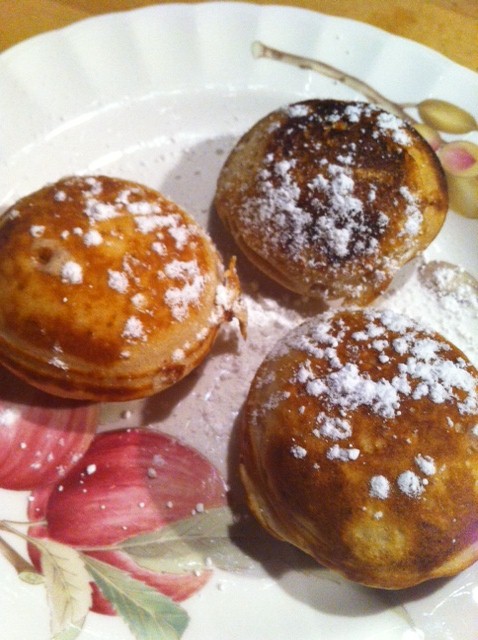
Danish Pancake Balls (Aebleskiver)

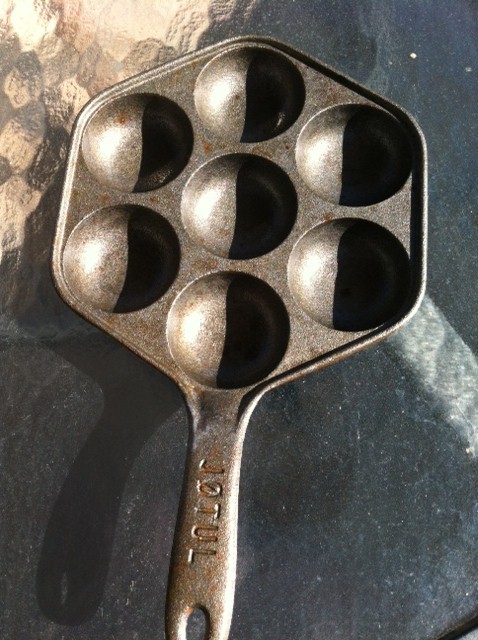
While rummaging through some cupboards I found my mother-in-law’s Aebleskiver pan.  When you find an Aebleskiver pan what do you do?  You make Aebleskivers!  Also, it’s an excuse to say Aebleskivers.

Æbleskiver (Danish meaning apple slices (singular: æbleskive)) are traditional Danish pancakes in a distinctive shape of a sphere. Somewhat similar in texture to American pancakes crossed with a popover, æbleskiver are solid like a pancake but light and fluffy like a popover. The English language spelling is usually aebleskiver or ebleskiver. In the United States, a version of æbleskiver is sold with a commercially repackaged pan, branded as “Pancake Puffs”.

Serve the warm pancake balls with butter and jam or dusted with powdered sugar. To make filled aebleskiver, add about ½ teaspoon jam to the batter in each cup just before you make the first turn. Serve the pancake balls as they are cooked, or keep warm in a napkin-lined basket until all are ready. The batter can also be cooked on a lightly buttered griddle over medium heat to make light, tender pancakes. For mile-high baking, reduce the baking powder to 2½ teaspoons.

Danish Pancake Balls (Aebleskiver)

Makes 12

1¼ cups all-purpose flour
3 Tbs sugar
2¾ tsp baking powder
¼ tsp ground cardamom or ground cinnamon
¼ tsp salt
1 large egg
1 cup milk
About 4 Tbs melted butter, divided

In a bowl, mix flour with sugar, baking powder, cardamom, and salt. In a small bowl, beat egg to blend with milk and 2 tablespoons butter. Add liquids to dry ingredients and stir until evenly moistened.

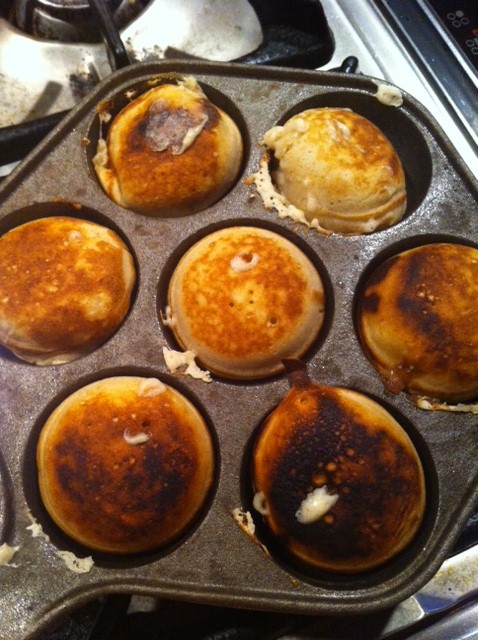
Place an aebleskiver pan over medium-low heat. When pan is hot enough to make a drop of water dance, brush pancake cups lightly with melted butter and fill each to slightly below the rim with batter.

In about 1½ minutes, thin crusts will form on bottoms of balls (centers will still be wet); pierce the crust with a slender wood skewer and gently pull shell to rotate the pancake ball until about half the cooked portion is above the cup rim and uncooked batter flows down into cup. Cook until crust on bottom of ball is again firm enough to pierce, about another minute, then rotate ball with skewer until the ridge formed as the pancake first cooked is on top. Cook, turning occasionally with skewer, until balls are evenly browned and no longer moist in the center, another 10 to 12 minutes. Check by piercing center of last pancake ball added to pan with skewer–it should come out clean–or by breaking the ball open slightly; if balls start to get too brown, turn heat to low until they are cooked in the center. Lift cooked balls from pan and serve hot with jam and powdered sugar. Repeat to cook remaining batter.

Pantry Organization

Pantry Organization 101

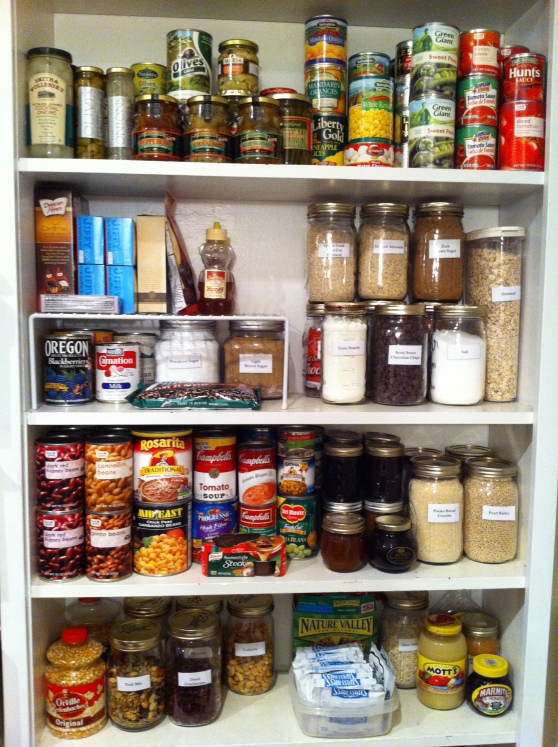
I decided it was time to organize the pantry. I can only do this when the mood strikes me, which is very rare. I found a bunch of mason jars in the basement. My father-in-law used to make pickles in these jars. I cleaned them up and decided to put all my dry goods in them. We have a huge problem with those little pantry moths!

The first step in the organization process (after deciding to get organized) is to a do a little housekeeping.

  1. Take everything out of the pantry including food, food storage containers and junk/trash that may have accumulated.
  2. Dust the pantry, starting with the highest shelf, and then wipe down each shelf one at a time. Be sure to cover the tops of doors and check the ceiling for cob webs.
  3. Line up the food items in one space so you can see everything at once. Suggestions: kitchen table, dining room table, or even the floor. This way you’ll be able to spot duplicates, spoiled foods and get a general sense of how much space each type of item will need.

Assess each item one-by-one and ask yourself these questions:

  • Has this expired? If yes, throw it out.
  • Do I use this? If no, throw it out.
  • Do I like this? If no, throw it out.

When I used to move into new apartments each year I would line things up in my kitchen cabinets by size and height. This makes sense on a visual level but doesn’t exactly make for the best organizing scheme. The trick here is to group items together by type.

As an example, have a vinegar group which includes: champagne, apple cider, balsamic, rice wine. To that mix add olive and grape oil, and an olive oil spray. The bottles vary in height and width, but now when I want to make a salad dressing, everything I need is occupying the same space in my pantry.

Here are some common groupings:

  • Cans of beans and soups
  • Bags of snack foods
  • Bottles of oils and vinegar
  • Jars of spices
  • Boxes of grains (rice, cereal)

Maintain your new organizing scheme by consistently going through your pantry and declutter. If you do this regularly, you may not have to repeat the entire process of emptying and cleaning the pantry all over again. I recommend the following schedule:

  • Weekly – declutter
  • Monthly – declutter and re-group
  • Seasonally – declutter, re-group, re-fit storage solutions

This schedule will depend on how often you cook and the size of your pantry space. I like to go through mine once a week while I am planning meals

Hint: The more often you declutter your pantry, the less time the process will take in the future.

Curried Jumbo Shrimp With Apples

I was going through my old cooking notes and ran across this recipe from The New York Times from 1989.    This is easy and fast to make.  I love curry of any kind.  This one uses apples, which are coming into season now.  Serve this over a bed of basmati rice.

Curried Jumbo Shrimp With Apples

Serves 4

24 jumbo shrimp, about 1½ lbs
2 Golden Delicious apples
2 Tbs curry powder
Salt to taste
1 Tbs butter
1 Tbs shallots, finely chopped
¼ cup sour cream
½ cup plain yogurt
1 Tbs chopped fresh mint or 1 tsp dried

Peel and devein the shrimp.

Core and peel the apples and cut them into ½-inch cubes.

In a mixing bowl combine the shrimp, apples, curry powder and salt. Blend well.

Heat the butter in a nonstick skillet large enough to hold the shrimp in one layer. Add the shrimp mixture and shallots and cook, stirring, over high heat for 3 minutes. Add the sour cream and yogurt, and blend well. Bring to a boil and cook, stirring, for 3 minutes. Add the mint and serve immediately over rice.

Classic Beef Pot Roast

Less is More

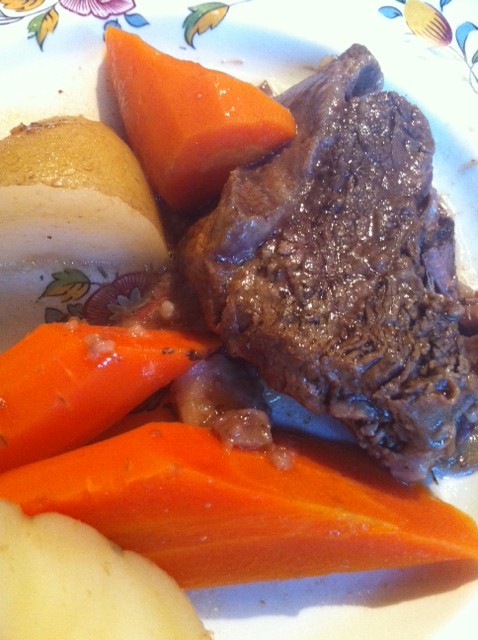
Years ago my mother-in-law taught me how to make her pot roast. This recipe is so simple it takes me about 10 minutes to make it. There is no seasoning what so ever – not even salt and pepper. It doesn’t need any.  I usually use a 7 Bone Roast.  There are not 7 bones in this roast.  The 7-bone roast is from the chuck section of the steer or heifer and it includes a cross cut of the shoulder blade. The bone is shaped like a “7”, which gives the roast its name. I don’t think these roast are available in other parts of the country.  You can use any kind of beef that is good for pot roast.

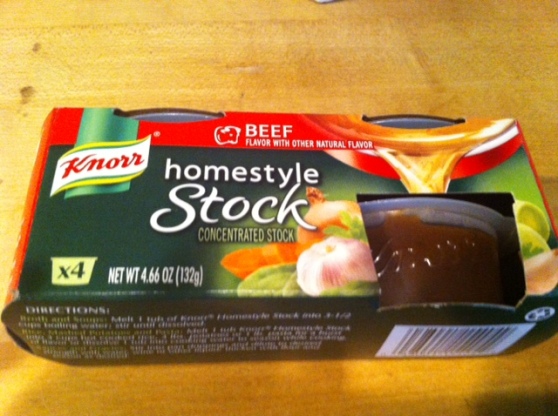
I’ve been using this Knorr beef stock concentrate, but you can use any kind of stock you like or even beef broth.

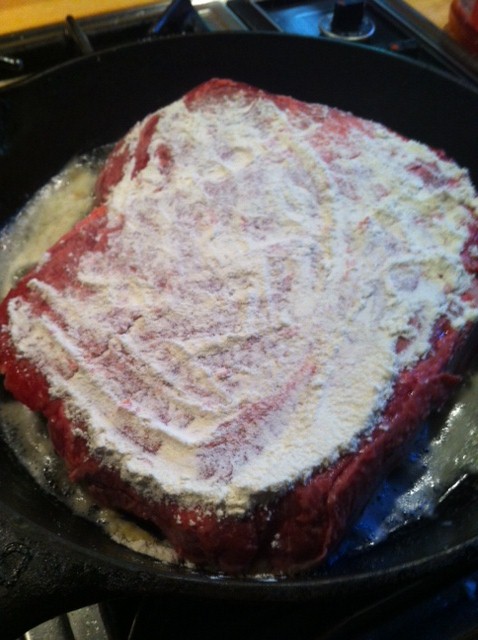
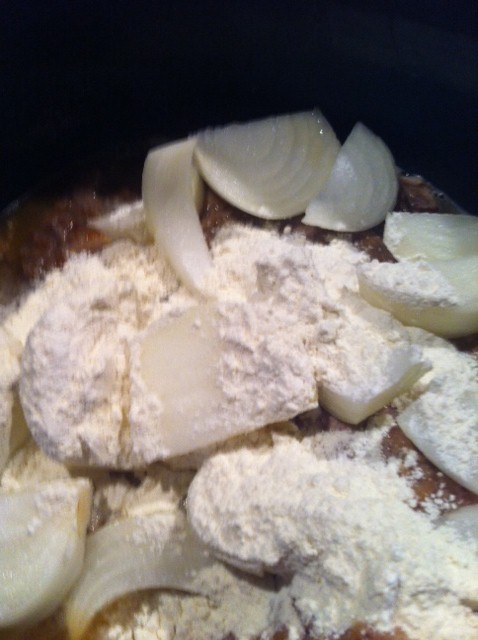
Yes, I know it looks weird to dump some unspecified amount of flour on the top, but it works. I wouldn’t dream of messing with my mother-in-laws recipe!

Classic Beef Pot Roast

4 lbs chuck roast
Flour
2 Tbs beef stock
2 cups beef stock
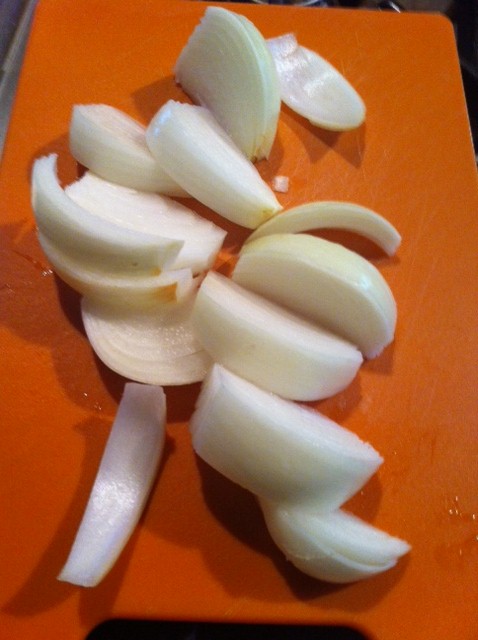
1 onion, thickly sliced
6 carrots, thickly sliced
3 potatoes, peeled and quartered

Dredge the roast with the flour. Brown the roast in a cast iron skillet in butter on all sides in a large skillet over high heat, about 4 minutes per side.

Place the roast in the slow cooker and then deglaze the pan with the beef stock, stirring up all the beef bits at the bottom.  Pour over the roast in the crockpot. Place the onions on the top of the roast. Sprinkle it with some flour.

Cover and cook on Low setting for 8 to 10 hours.

Next, ladle out several ladles full of the stock into a large pot. Put the carrots and potatoes in and top up with enough water to cover. Bring to a boil and simmer for about 15 – 20 minutes until tender. Serve alongside the roast.

Wild Rice & Chicken Casserole

I used to make this casserole when we were first married for dinner parties.  It was “cheap and cheerful” as we would say.  Personally, I prefer to use a wild rice blend when making this dish, which does make it cheaper!

Wild rice (also called Canada rice, Indian rice, and water oats) is four species of grasses forming the genus Zizania, and the grain which can be harvested from them.

Almost always sold as a dried whole grain, wild rice is high in protein, the amino acid lysine and dietary fiber, and low in fat. Like true rice, it does not contain gluten. It is also a good source of certain minerals and B vitamins.

Wild Rice & Chicken Casserole

Serves 8

½ cup wild rice, cooked according to instructions
½ cup onion, chopped
½ cup butter
¼ cup flour
6 oz can sliced mushrooms
1 1/3 cup chicken broth
1½ cups light cream or half and half
3 cups cooked chicken, diced
½ cup pimento, sliced
1 tsp salt
2 tsp parsley
¼ tsp black pepper
½ cup blanched, slivered almonds
2 Tbs Sherry

Sauté the onion in butter until soft, remove from heat and stir in the flour.

Drain the mushrooms, reserving the liquid.  Add enough chicken broth to the mushroom liquid to measure 1½ cups.  Gradually stir the liquid into flour mixture, then add the cream.  Cook and stir until thick.  Combine with the wild rice and cooked chicken.  Add salt, pepper, sherry and parsley.  Place in a 13”x 9” casserole and sprinkle with the almonds.

Bake at 350˚ for 25 to 30 minutes.

The Rusty Nail

The Dog Days of summer are upon us and with the much-longed-for hope of fall comes the need to shift our drinking habits to suit the season (mind you, I could happily drink chilled Cotes de Provence well into November if the sun holds out…….).  Where I live it is always the case that the hottest days of summer come at the beginning of autumn and these “dog days,” which the ancients believed to be an evil time when “the sea boiled, the wine turned sour, dogs grew mad, and all other creatures became languid” are when we must put aside our gin and tonics and other summer coolers and start thinking about autumnal libations.  Oliver Goldsmith, writing his 1766 “Elegy on the Death of a Mad Dog” must have been writing in the dog days of September:

This dog and man at first were friends;
But when a pique began,
The dog, to gain some private ends,
Went mad and bit the man.

Writing–as he was–in 1766, he just might have had his own autumnal tipple in the form of Dambuie which had already been on the market for twenty years at the time.  In July 1746 Scotland’s Bonnie Prince Charlie was on the run, after defeat at the Battle of Culloden had ended his hopes of restoring the Stuarts to the throne of Great Britain.  The Prince was pursued by the King’s men across the Highlands and Islands of Western Scotland, bravely aided by many Highland Clans. Amongst them was Clan MacKinnon, it was their chief John MacKinnon, who helped the Prince escape to The Isle of Skye. In thanks for his bravery the Prince gave John MacKinnon the secret recipe to his personal liqueur, a gift that the Clan were to treasure down the generations. An extraordinary elixir that would, many years later, become known to the world as Drambuie.

What better way to enjoy this nectar than in a cocktail know as a Rusty Nail?  It is simply Dambuie mixed with Scotch whiskey.  Period.  Less Drambuie makes for a drier cocktail although two parts whiskey to one of Drambuie is the usual proportion. Scotch whisky has a fairly biting and hot taste that is counterbalanced by the honeyed, herbal overtones of the Drambuie. A Rusty Nail can be served in an old-fashioned glass on the rocks, neat, or “up” in a stemmed glass. In our house it is always served over ice.

While it has been around for over two hundred years, Drambuie only gained popularity in the US during prohibition, when it had become a very popular drink in the speakeasies of the East Coast, due to its ability to mix well with the raw American prohibition spirits and mask their unrefined flavours.  According to the folks at Darambuie, these early concoctions became the forerunners to the famous Rusty Nail. Its exact origins are uncertain but we know that it first appears on the menu of an infamous New York club in the early 60s. At a time when the legendary carousing of the Rat Pack came to prominence, the Rusty Nail was adopted by the scene, confirming the drink’s iconic status and establishing its place in pop culture history.

They must have been shipping it all to America–when I was doing my year abroad in college in France, I went on a road trip to the Isle of Skye, determined to buy a bottle of Drambuie, find some loch to overlook and get in touch with my Scottish roots.  Not a bottle to be had on the Isle of Skye! I did end up procuring a bottle and swigging it at dusk while sitting on the banks of Loch Ness. It was a moment.

My husband assures me that a dry Rusty Nail is the perfect autumn cocktail, suitable for dog days, mad dogs and even the hair of the dog, as sure a cure for tetanus as it is for rabies…..but do use a decent whiskey.

The Rusty Nail

1 1/2 oz Blended Whiskey (Dewars will do nicely)
1/2 oz Drambuie

Mix well and serve over ice in a chilled Old-Fashioned glass

Potato Poppers

Latke Macaroons

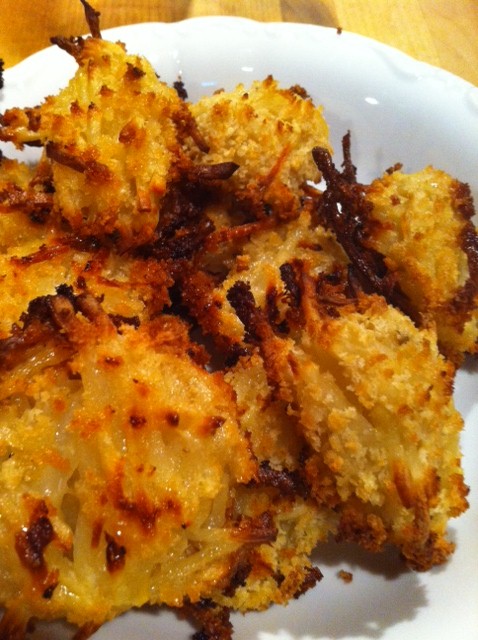
Last night, I attempted to make this potato recipe for dinner. I should not have done this. I was way too tired to cook and the box grater fell behind the damn twirling corner cabinet (who invented those anyway?). I spent 25 minutes trying to extract the DAMN grater using a yard stick, metal skewer, tongs, etc. The fact that kneeling on the floor is no longer a viable option for me does not help my mood (I fell on a handicap bumper in the parking lot of a dive Mexican restaurant months ago and did something terrible to my knees), thank goodness I’m not Catholic! To make a long story short, I used a mandoline to grate the potatoes. Basically, it didn’t work. Also, I burnt them! They look more like latke macaroons!  If anyone would be so kind as to test the recipe for me using the proper equipment, it would be GRATELY appreciated! (pun intended…)

Potato Poppers

Makes 24

2 large russet potatoes (about 1 lb)
1/2 cup all-purpose flour
1 Tbs cornstarch
½ tsp coarse salt
¼ tsp ground white pepper
1 large egg yolk
¼ cup olive oil
1½ cups panko flakes
Ketchup, for serving

Preheat oven to 425 degrees, with oven rack in center position. Place a rimmed baking sheet in oven.

Peel and grate potatoes and transfer to a large bowl. Cover by two inches with boiling water. Steep 10 minutes. Drain potatoes in a colander and rinse thoroughly with cold water. Squeeze potatoes with hands to remove excess moisture and transfer back to large bowl.

Add flour, cornstarch, salt, pepper, and egg yolk to bowl and fold into potatoes.

Spread panko on another rimmed baking sheet. With wet hands, pinch tablespoons of potato mixture, form into balls, and toss in panko.

Carefully remove hot baking sheet from oven and coat with 2 tablespoons olive oil. Quickly transfer poppers to baking sheet, drizzle with remaining olive oil, and bake for 30 minutes, flipping once, until golden brown and crispy. Serve with ketchup.